Use Zoom for Exam Invigilation
Zoom can be set-up for the purpose of invigilating online exams in real-time. There are specific settings that should be enabled/disabled for the Zoom meeting if it is used for invigilation purposes as opposed to an online lecture. This page details the steps that instructors should take to ensure that Zoom is properly set up for invigilation.
The following note should be included in your exam invigilation instructions to students:
Record Invigilation Sessions
Invigilation of exams may be recorded using cloud recordings only. Local recording is not permitted. There is a maximum of 25 video feeds that can be displayed per page in gallery view. Please refer to the section on running and recording a meeting to learn how to start a cloud recording in Zoom. Make sure you review your cloud recording settings to ensure it will record in the correct format before the exam.
Note: You can only be part of one Zoom meeting at a given time and you cannot host multiple concurrent meetings. Learn more about hosting multiple simultaneously on Zoom.
Roles and Permissions in Zoom
- Host: dedicate one person to be the host who will be responsible for the following:
- Set-up the Zoom meeting
- Admit participants from the waiting room
- Create and start breakout rooms
- Oversee and manage the session during the exam
- Co-host: TAs/Invigilators/Instructors will stay in the breakout rooms and invigilate the students.
- Participants: Students stay in the waiting room until they are admitted and assigned to a breakout room by the host.
Set up Zoom for Exam Invigilation
1. Host checks Zoom settings
Zoom Settings
You should review the default Zoom meeting settings set for your account. There are a couple settings that we recommend disabling/enabling for exam invigilation purposes. To access your Zoom Settings, log into Zoom at: https://zoom.us/signin. Click on Settings from the left-hand menu.

Recording tab
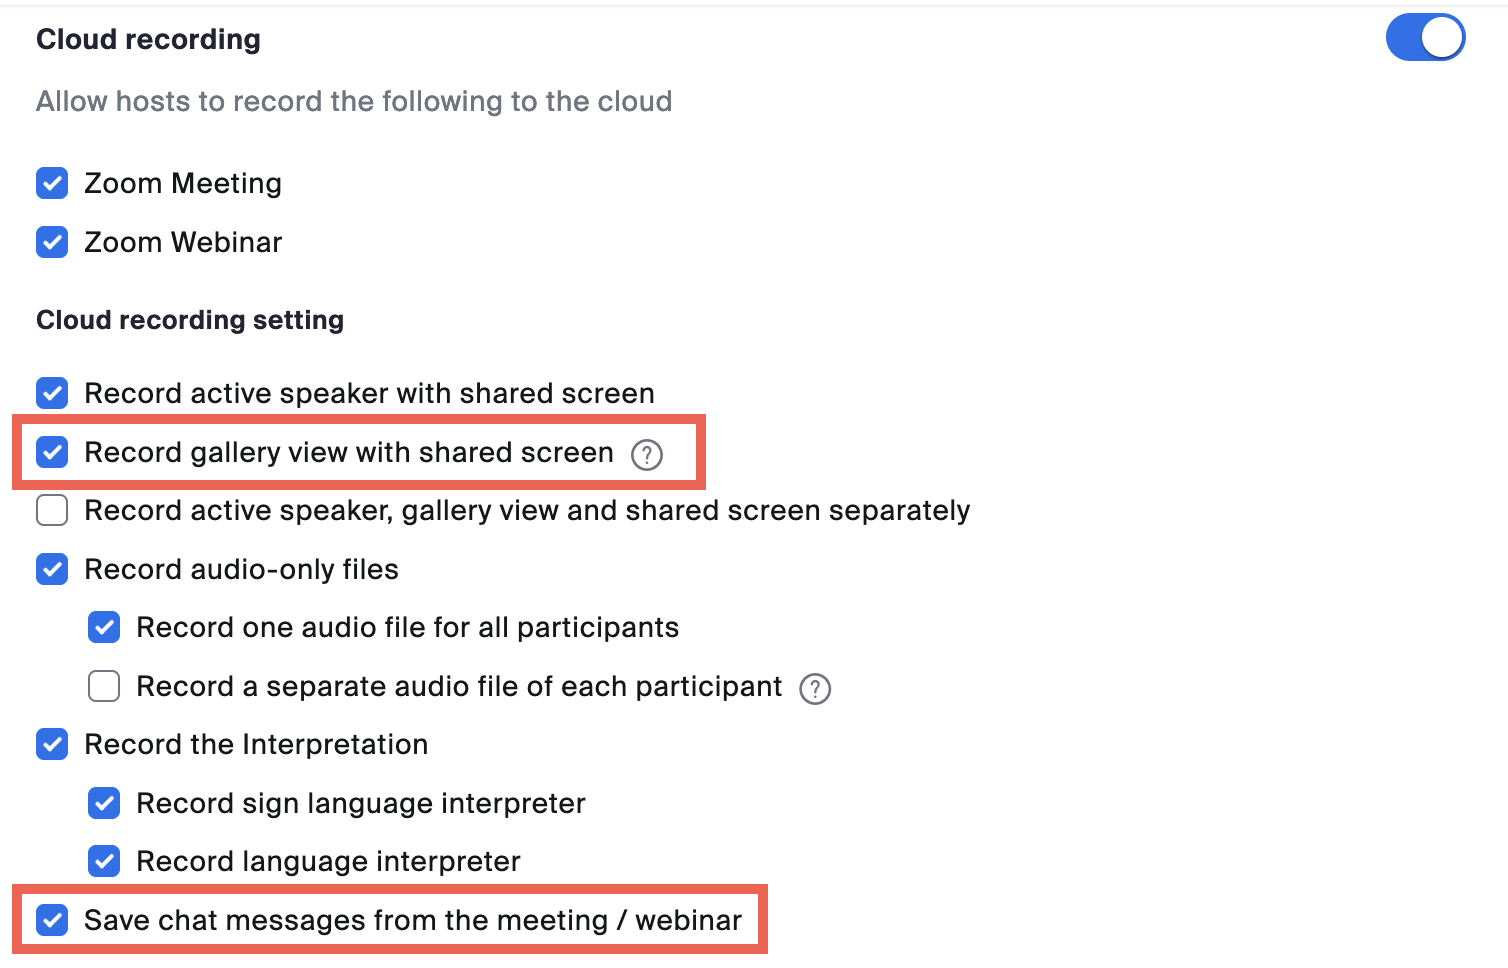
If you are recording the invigilation session, under the Cloud recording setting, the following settings are recommended:
- Record gallery view with shared screen. This will display the video feeds of the students in the recording
- Save chat messages from the meeting/webinar
- Add a timestamp to the recording
- Display participants' names in the recording
- Record thumbnails when sharing
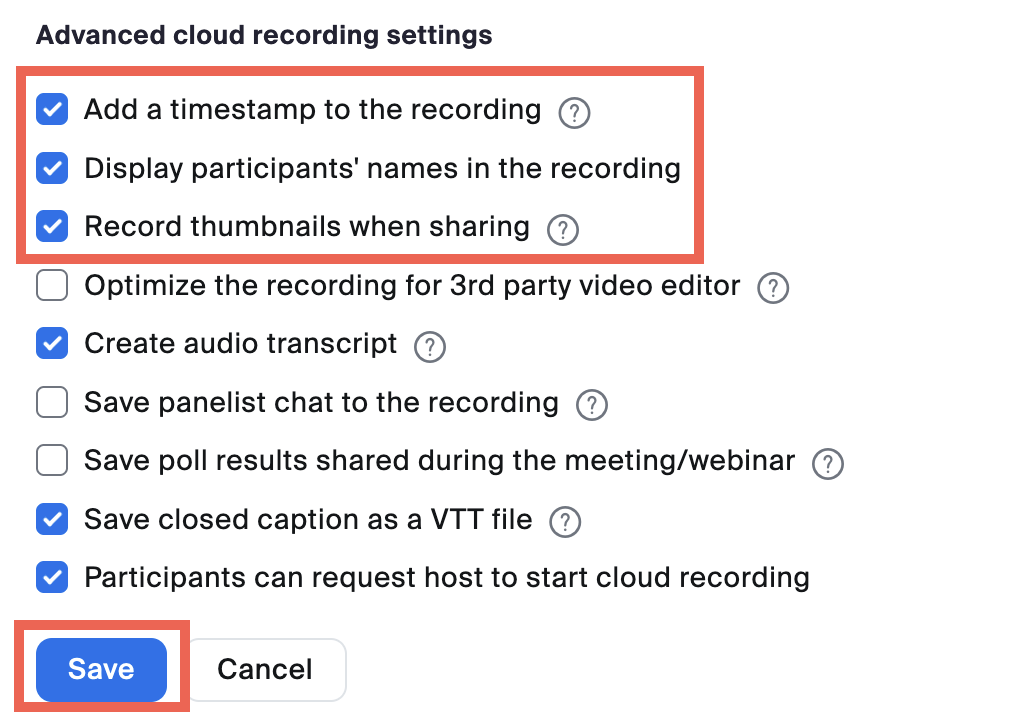
After enabling these settings, click on “Save” to save those changes.
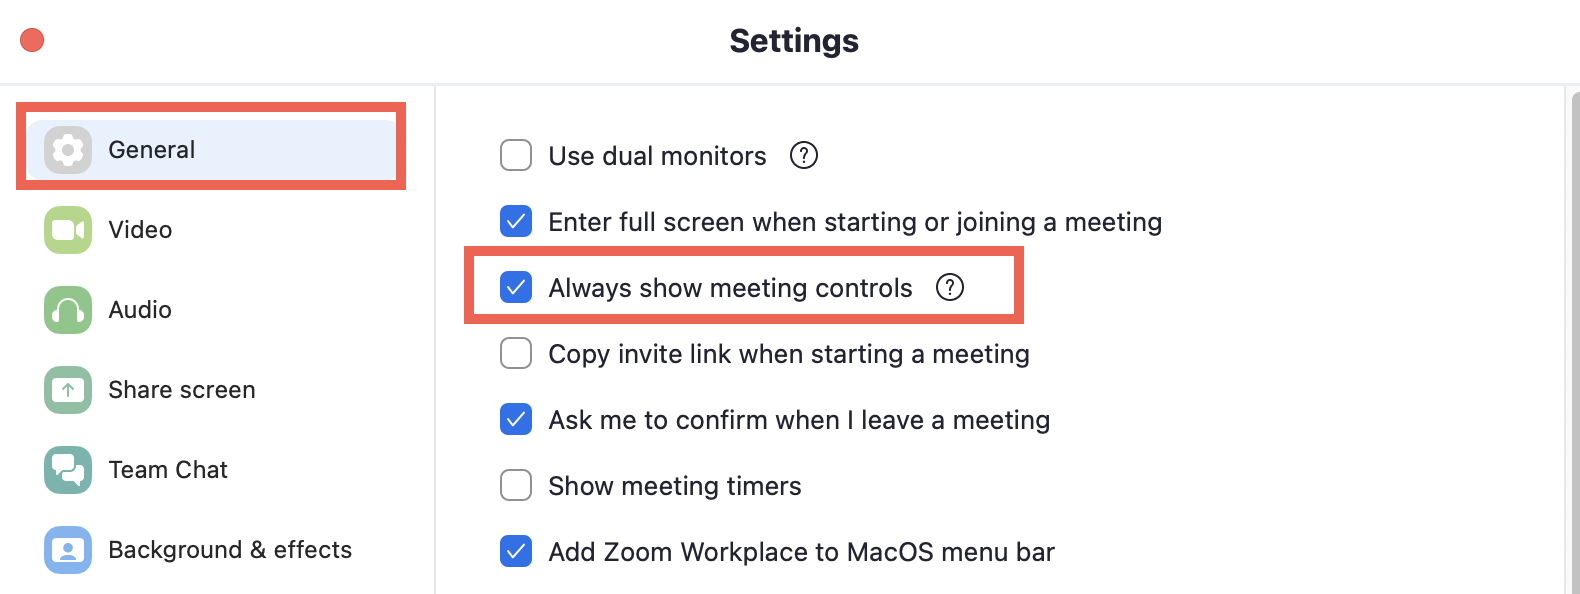
In the Zoom desktop application
- Always show meeting controls: enable this option so you have access to the controls on the toolbar at all times.
Zoom Profile
Check your Zoom profile to see what the maximum meeting capacity you can hold in your meetings is.
- To access your Zoom Profile, log into Zoom at: https://zoom.us/signin.
- Click on Profile from the left-hand menu.
- Scroll down until you see Account and check your capacity next to “Meeting”.
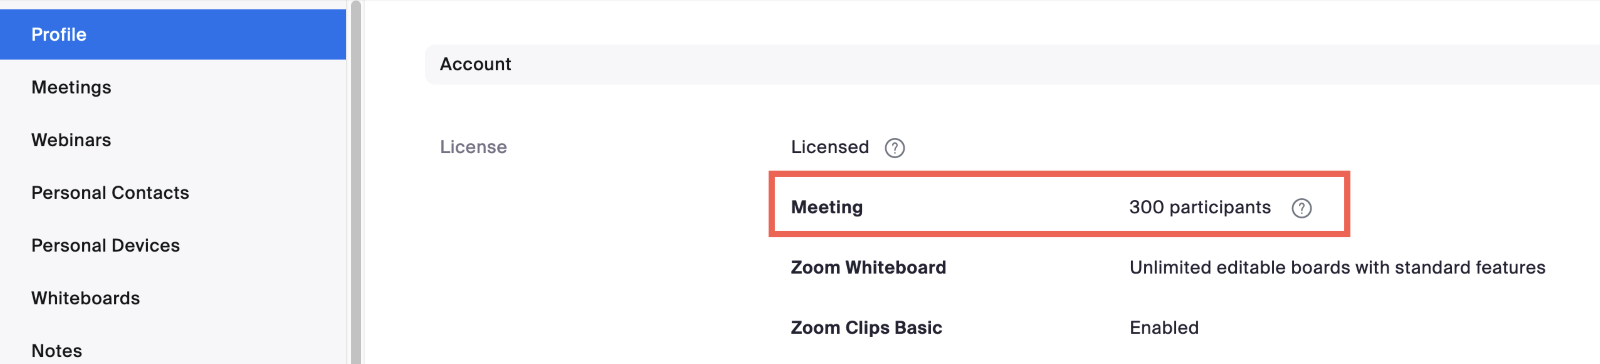
If you need to be able to host larger meetings, please contact av.helpdesk@ubc.ca.
2. Host sets up Zoom meeting in Canvas
- Log into your Canvas course.
- Click on the Zoom link from the left navigation menu.
- Click on Schedule a New Meeting button.
- Fill in all the meeting information. All the settings should be kept as default except for the following:
- Topic: enter a name for your meeting.
- When: specify the date of the exam and the start time (set the start time to be at least 30 minutes before the exam start time to account for set-up and identity checks, more details below).
- Duration: indicate how long the exam will be.
- Security: check the waiting room option.
- Meeting Options: check the "mute participants upon entry" option.
- Alternative Hosts: if your TAs/Invigilators have UBC Zoom accounts, you can add them as alternative hosts so they automatically show up as co-hosts when they join the meeting.
- Your meeting is now set up.
For large courses, instead of having all students join one session with multiple breakout rooms, create multiple Zoom meetings to break the students into smaller groups. For example, the Zoom meetings can be created by the Co-instructors/TAs/Invigilators and they will be the host of those sessions.
3. Teaching team joins Zoom meeting
There are certain settings that can only be done within the meeting, so it is recommended that the teaching team joins around 20 minutes before the exam start time.
3.1. Start the meeting and disable chat
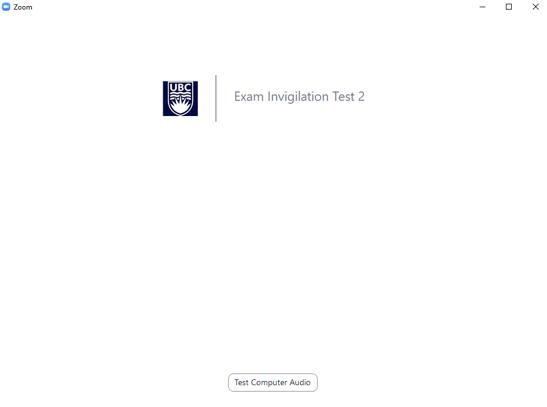
- The host will need to start the Zoom meeting first. If this is your first-time using Zoom, you should download the Zoom desktop application. If you already have the application installed, click on Open zoom.us when prompted to.
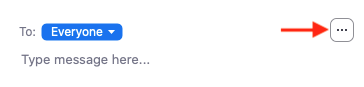
- The host should disable the ability for participants to message everyone in the main room. Click on Chat from the bottom of the meeting screen and a chat window will appear on the right.

- Click on the three dots beside To: Everyone and check “Host only”.
3.2. Make teaching team co-hosts
- The teaching team (Instructors/TAs/Invigilators) will join the meeting by clicking on Zoom within Canvas.
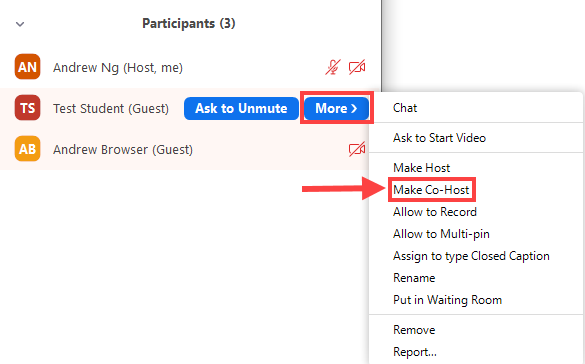
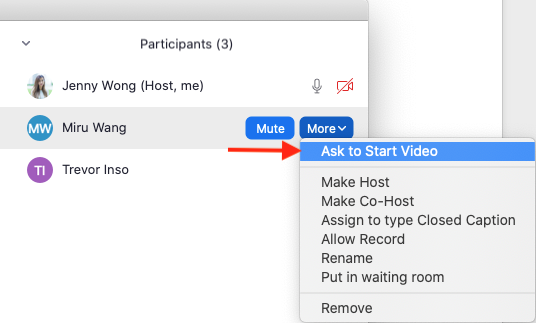
- After everyone joins, the host needs to change everyone to “Co-hosts” (they join as “participants” by default). In the participant list, hover over the name > click on More > choose Make Co-Host. Repeat this for everyone in the teaching team. (You can have up to 50 co-hosts).
4. Students join Zoom meeting
Students should join the meeting at least 15 minutes before the exam so the host can assign them to breakout rooms.
- Students log into Canvas and click on Zoom from the course navigation.
- Students will be directed to Zoom to join to the meeting. If students join through the browser, they will be asked to enter their name. Ask students to use their surname and their preferred first name that they have on file with UBC when joining the meeting. If the “waiting room” feature is used, they will stay in the “waiting room” until the host/co-host(s) admits them. The student will see the following message when they are in the waiting room. Learn to customize the message in the waiting room.
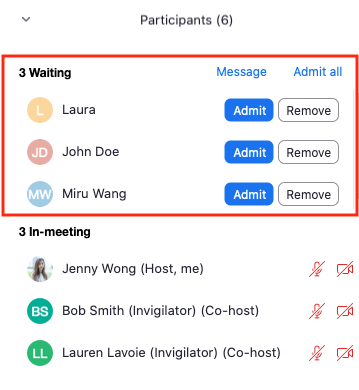
- The host/co-host will click on Participants at the bottom of the meeting screen to see a list of participants in the main room as well as the people in the waiting room.

Students will appear in the order they join, with the first one on the list being the first to join. The host or co-hosts can click on Admit to admit the students individually or Admit all to admit everyone at once.
- Once most of your students have joined the meeting, click on Breakout Rooms at the bottom of the meeting window.
![]()
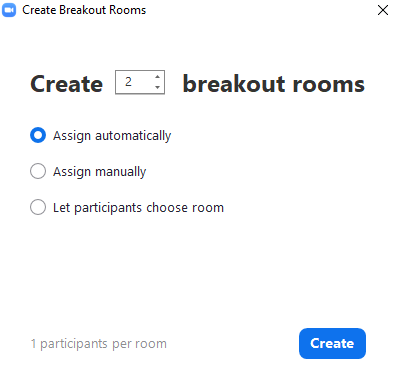
- Indicate the number of breakout rooms you want to separate the students into and choose whether you want the students assigned Automatically (system assigns randomly) or Manually (host manually assigns).
Click on Create Breakout Rooms and then on Create when you are ready to create the rooms.
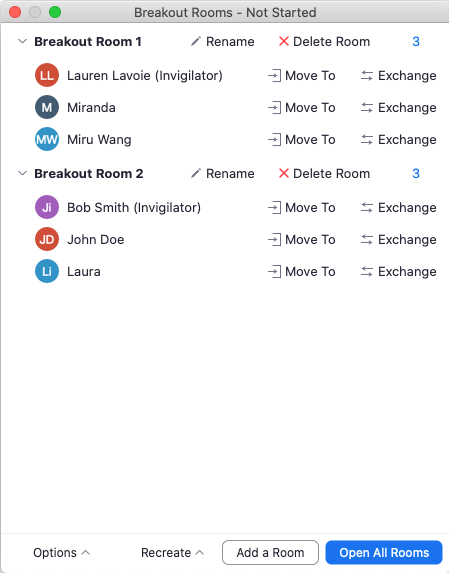
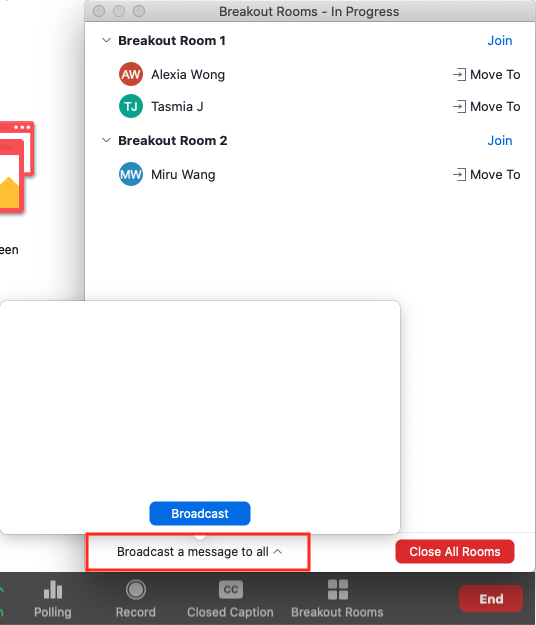
- You will then see a window that shows who is assigned to each breakout room. You can move participants to different breakout rooms by clicking on Move To or exchange participants between rooms by clicking on Exchange.
- Click on Options at the bottom of the breakout room screen.
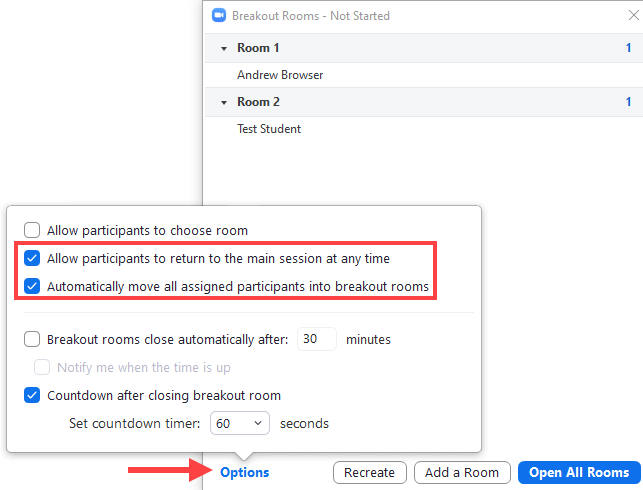
- Automatically move all assigned participants into breakout rooms: check this option so participants are automatically moved to the breakout rooms once you “open” the breakout rooms.
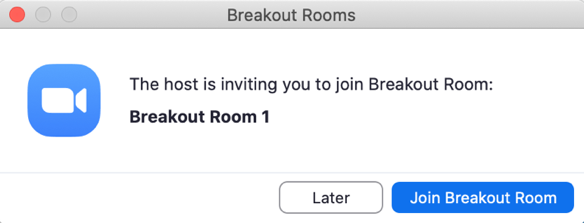
- Note: If this option is unchecked, students will receive a notification to join the breakout room on their screen and they will need to click on Join Breakout Room.
- Allow participants to return to the main session at any time: check this option so students can go to the main room and ask for help during the exam without interrupting other students in the breakout room.
- Once you have confirmed that everything looks good, click on Open All Rooms and the students will be distributed to their assigned breakout room.
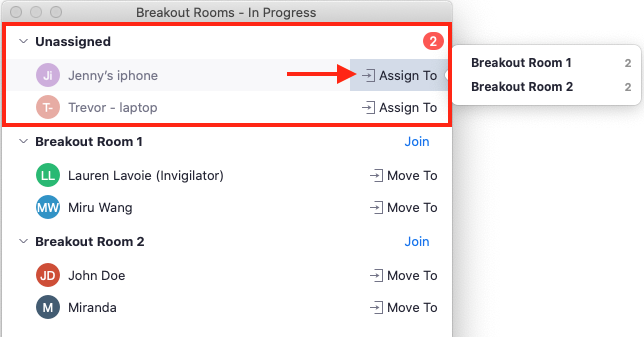
- If you have students who join after the breakout rooms have already started, the host can manually assign them to a breakout room. The students will appear under Unassigned in the breakout room window.
Click on Assign To beside the student you want to assign and select the breakout room you want to assign them to.
5. Invigilate breakout rooms
5.1 Monitor the video feeds
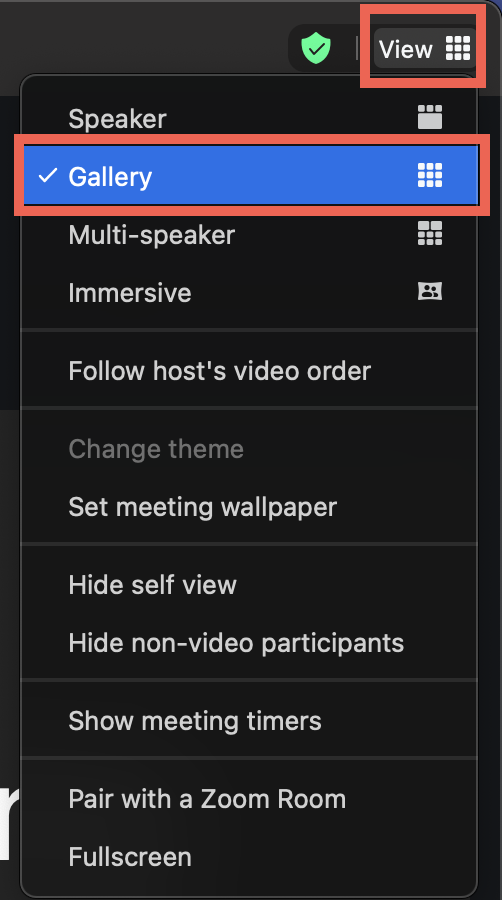
In the upper right-hand corner of your Zoom window, click on View and switch to Gallery View to see the video feeds of all your students. Most computers should have the capacity to view up to 25 video feeds per page. Depending on your computer’s CPU (see requirements), you may be able to display more videos on additional pages.
5.3 End the breakout room
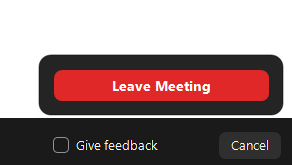
Once students finish their exams, they can leave the breakout room by clicking on the Leave button at the bottom of the meeting window and then click Leave Meeting.
Additional Considerations
Constraints
Instructor Constraints
- If Zoom is used for exam invigilation, it would be difficult to identify where the noise is coming from if all the students have their audio enabled.
- The video quality is unpredictable and is dependent on internet connection. The video feed on Zoom can be blurry and pixelated if there is poor connection.
- Anyone who has the meeting URL will be able to join the session.
Student Constraints
- Students need to have a webcam and microphone if Zoom is used for invigilation purposes.
- When joining a session using the web client (e.g. joining from your browser), certain browsers do not support all the features in Zoom. The recommended browser is Chrome (see which browsers support Zoom).
Other Constraints
- You can create up to 100 breakout rooms for any number of participants.
- This will apply for all breakout room types, including 'Pre-Assign' and 'Self-Select' breakout rooms.
- Note: If you expect to have 300-1000 participants, you will still need to request for a large meeting add-on, regardless of if you are using breakout rooms or not.
Recommendations
- Do a practice run by scheduling a Zoom meeting with your class before the exam so students know what to expect and can resolve any technical difficulties beforehand.
- Have a contingency plan in place for students who do not have a webcam or experience technical difficulties with joining the meeting.
- If you have concerns about anyone having the meeting link being able to join the exam session, follow the steps below:
- Allow only authenticated participants to join the meeting
- By enabling only authenticated users to join your meeting, students will have to sign up and create a Zoom account at https://ubc.zoom.us/ .
- This will prevent any anonymous users without a Zoom account to join.
- To enable this feature, sign into the Zoom web portal at https://zoom.us/signin, go to Settings in the navigation menu on the left, and scroll down to the section Security.
- Toggle on the options “Only authenticated meeting participants and webinar attendees can join meetings and webinars” and “Only authenticated users can join meetings from Web client”.
- For larger meetings, you can enable registration which will require students to register for the meeting with their name and email address.
- To enable this feature, go to your meeting settings and check “Required” next to Registration.
- By enabling only authenticated users to join your meeting, students will have to sign up and create a Zoom account at https://ubc.zoom.us/ .
- Maintain privacy of Zoom link
- Share your meeting links within your course and avoid sharing it on social media or websites that are publicly available.
- Unless the Waiting Room is enabled, anyone with your meeting link can join your meeting.
- Enable the waiting room.
- If the “waiting room” feature is used, students will stay in the “waiting room” until the host/co-host(s) admits them to the main room.
- The host and co-hosts can click on Participants to see a list of students in the main room and in the waiting room. This allows you to check for student identification before admitting them to the main room.
- To enable this feature, sign into the Zoom web portal at https://zoom.us/signin, go to Settings in the navigation menu on the left, and scroll down to the section Security.
- Toggle on the option Waiting Room.
- Disable “Allow participants to rename themselves”
- To prevent this, sign into your account at https://zoom.us/signin and go into Settings.
- Scroll down to the section In Meeting (Basic) and toggle off the option “Allow participants to rename themselves”.
- Allow only authenticated participants to join the meeting
Last updated on: October 1, 2024